
Difficulty
Moderate
Steps
11
Time Required
- BNB Universal X-Carriage 11 steps

In Progress
This guide is currently being written. Reload periodically to see the latest changes.
Quiz
0
Introduction
Universal x-carriage allows your choice of Bear or Prusa carriage with your choice of extruder. Bear/BNB, Prusa, and Bondtech upgrade extruders are supported....
Bunny and Bear Geared,
Bunny and Bear Short Ears
Bear
Prusa MK3 R3
Prusa MK3S R4
Bondtech I3 Upgrade
This BNB extruder x-carriage has belt paths for both Bear and Prusa x-axes. The upper one is for Bear x-axis, the lower one is for Prusa x-axis. Push belt ends into slot corresponding to your axis.
Because this is based on the BNB Easy Motor Service carriage for Bear extruder, you also gain simple motor bolt access for BNB and Bear extruders.
BNB Short Ears extruder should clear stock Prusa motor x-end when used with this carriage.
For Bear and BNB family extruders...
This carriage also moves extruder 1.5 mm closer to x-axis, but maintains same dimensions for most bolts inserted through x-carriage. Note that the 10 mm bolt just above bottom bearing that connects extruder body to x-carriage must be changed from 10 mm to 8 mm. That was the only Bear/BNB family bolt for which there was no clearance available to compensate for the thinner carriage.
For Prusa extruders...
Carriage still moves extruder 1.5 mm closer to x-axis, is thinner than Prusa x-carriages, and bolt mounting depths may differ from Prusa carriages. Consequently, you will need to shorten some bolts for proper fitment. Most obvious are the two MK3S bolts going through the hot end air duct. Please verify your bolt lengths before tightening. Also note that cable dress should be done "Bear" style rather than following Prusa conventions.
Combined with the BNB Short Ear Extruder's already pushed back motor, this carriage moves the motor to a fraction of a mm in front of the Z-axis T-nut
I have verified this carriage on both Bear and Prusa x-axes. It works as intended. Just be certain to use the correct insertion slot - Top for Bear, bottom for Prusa. Also, it is best to insert a short pit (two teeth long is sufficient) of belt into the empty slot BEFORE attaching belt ends.
Genuine Gates 2GT belts are thinner and much easier to insert than the Chinese GT2 belts I have in stock. I would build in more clearance for the belts, but there is very little space available without weakening the belt grips.
Testing on both axes reminded me why I switched to the Bear axis. It is SO MUCH easier to attach drive belt and get correct tension on the Bear axis. None the less, this universal x-carriage lets you run a BNB or Bear extruder on the Prusa x-axis.
As in the Skelestruder, you should stiffen the belt holding teeth of the carriage by stuffing the unused belt path with a two tooth long, piece of 2GT belt.
STL files for this item are at https://www.thingiverse.com/thing:361059...
Then geometry dash meltdown captivates players with its fast-paced gameplay, where timing and rhythm are essential for overcoming obstacles and progressing through the beautifully designed levels.
-
-
Bunny and Bear Universal X-carriage
-
Upper cover
-
Lower cover
-
Cable guide parts A & B
-
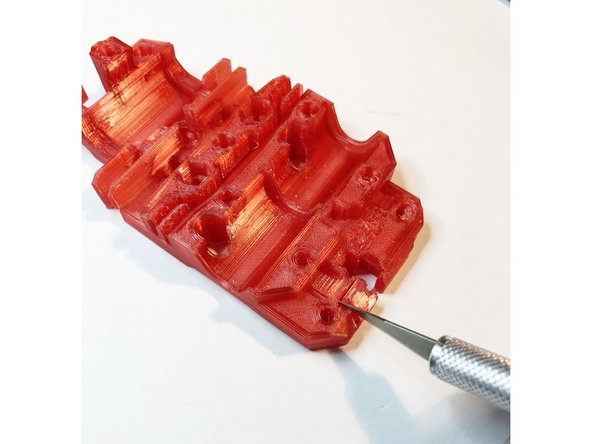
Process as usual for 3D printed parts. Some bolt holes now print with a sacrificial membrane to improve print geometry. Drill through membrane to open bolt holes. Most bores are 3 mm. Small leg of bottom rear cover has 2 mm bore.
-
Do not drill out hole for nylon support filament at end of cable guide
-
-
-
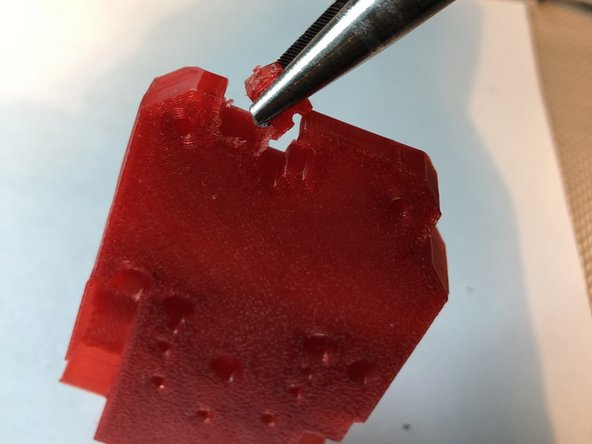
Optionally, remove intrinsic print support from hot end cable guide. Support snaps of easily with pliers. Smooth edge as needed.
-
-
-
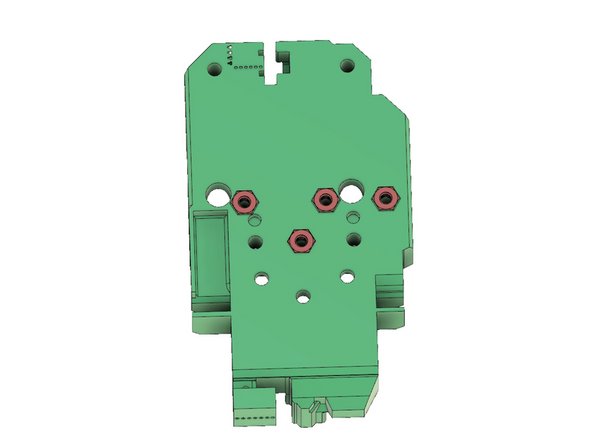
Embed four M3 nuts into front (flat mating surface) of x-carriage
-
These nuts must be fully seated into their pockets or 16 mm cover screws will not reach them. When fully seated they should be inset nearly 1 mm. Alternatively, 18 mm cover screws can be used, but design is for 18 mm.
-
If working in polycarbonate, elephant footing may require re-beveling entrance of each hex pocket with knife.
-
-
-
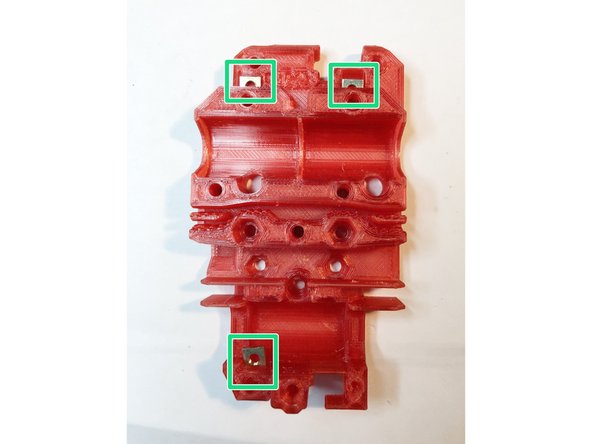
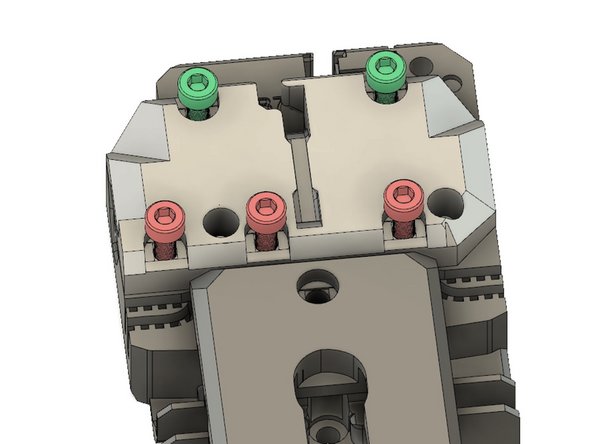
Insert three M3S square units into pockets. (Shown partially inserted)
-
Upper two M3S nuts have annoying tendency to fall back out after insertion. Bunnies avoid angry nut searches by locking them in place. Melt a bit of PETG filament into nut pocket entrance after nut insertion.
-
-
-
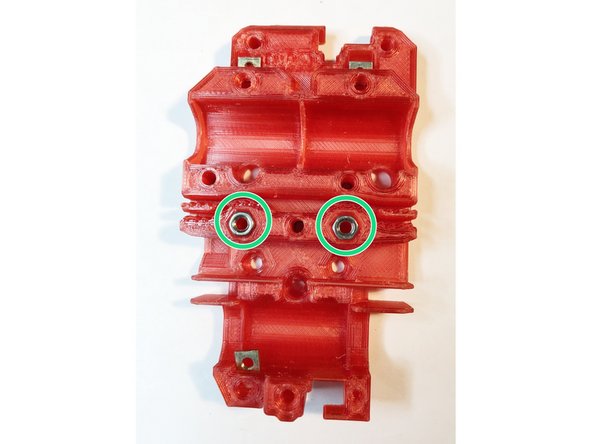
This step is ONLY if using R4 style bodies (Prusa R4, Butterworth, Bunny and Butterworth, Bondtech Prusa Upgrade), add two extra M3 nuts.
-
DO NOT INSERT THESE NUTS FOR BNBSX or BNB Short Ears extruders. BNBSX will use these holes "backwards" to pass a bolt directed forward.
-
M3 nuts for Prusa R4 style hot end screws.
-
-
-
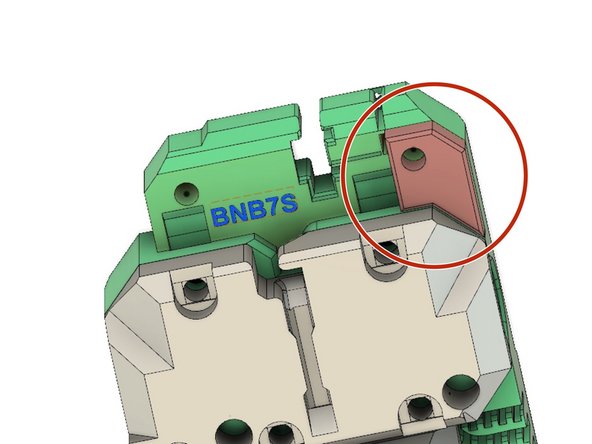
BNB Universal X-carriage works with both MK3 laser and MK3S IR filament sensor boards. However, MK3S is in different location and needs different access slot for cable.
-
Score and remove breakaway tab from x-carriage to make it MK3S compatible
-
Smooth edges as needed with blade or abrasive.
-
-
-
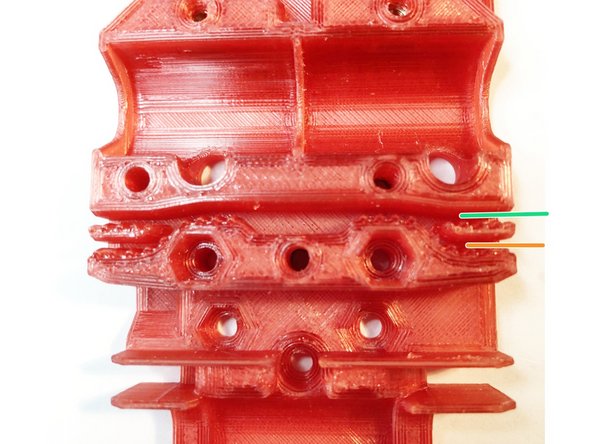
This carriage adapts to either Prusa or Bear style x-axes via Skelestruder-like dual belt clamp positions.
-
Use upper belt clamps for Bear x-axis. Bunnies MUCH prefer Bear x-axis for its superior tension adjustment system.
-
Use lower belt clamps for Prusa X-axis
-
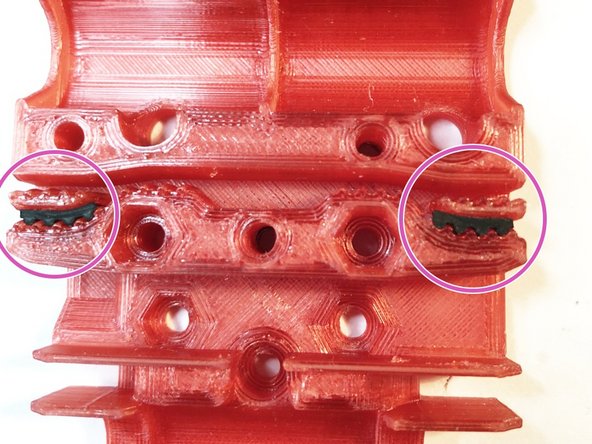
Before inserting x-belt, strengthen the clamp system with 4 tooth pieces of GT2 belt. Otherwise, you risk eventual fatigue failure.
-
Insert belt segments at entrance to each side's x-belt clamp path NOT being used.
-
-
-
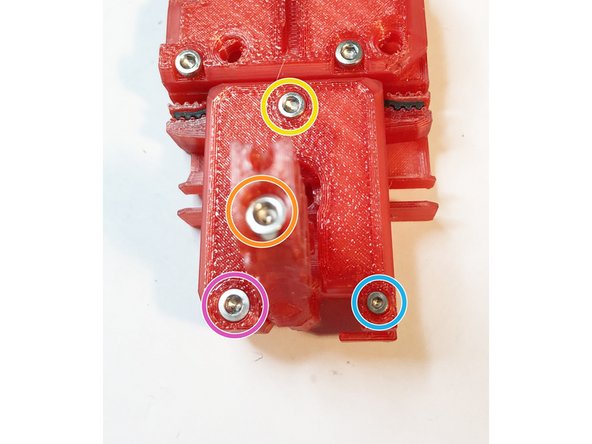
Pre-fit all cover screws now to verify all cover screws properly engage their respective nuts. Don't wait until actual installation on x-rods.
-
Two M3 x 12 mm top cover screws. (10 mm is OK)
-
Flat portions of screw pockets are printed as overhangs. Depending on printer and filament, you may need to clear out stray or misshapen plastic with knife.
-
Three M3 x 18 mm top cover screws. If these do not engage nuts, recheck nuts are fully seated and pocket flat free of debris.
-
M3 x 16 mm bottom cover screw
-
M3 x 12 mm bottom cover large leg screw
-
M2 x 12 mm bottom cover small leg screw. This screws directly into plastic. There is no nut. Be gentle.
-
M3 x 40 mm cable guide screw
-
-
-
ONLY for BNBSX Short Ears Extruder
-
Spacer allows use of standard length M3 x 30mm screw here instead of custom length screw.
-
-
-
Congratulations, your Bunny and Bear Universal X-carriage is ready for use.
-

Cancel: I did not complete this guide.
4 other people completed this guide.
19 Comments
I really appreciate the detailed guide on the BNB Universal X-Carriage! I’m curious, how did you fnaf determine the best materials for this design? When I built a model printer last year, choosing components took quite some time. The precision you've achieved is impressive! Any tips for beginners looking to replicate your success?
ilyacolton - Open Reply
Basketball Random is an exciting online sports game where players can participate in random basketball matches.
Well said. You highlight an important truth: effective fitness comes from proven principles, thorn and balloons not gimmicky “one-of-a-kind” plans. Smart personalization is about adapting solid fundamentals to individual needs, and that approach really does deliver results.
nytwordlehints - Open Reply
It is not only the races in Kart Bros. that provide tremendous thrills, but they also build a culture of competitiveness, camaraderie, and the joy of triumph. In addition to providing participants with opportunities to create unforgettable moments with their fellow drivers, each course is meant to test their driving abilities, strategies, and reflexes.